
You turned the burner knob, nothing happened, and now dinner plans are on hold while you stare at a cold stovetop wondering what went wrong. This guide walks you through the most common reasons a stove burner stops heating – whether you have an electric coil, a smooth glass top, or a gas range – and exactly what you can do about it.
A stove that won’t heat is one of those problems that goes from minor inconvenience to full household disruption faster than you’d expect. Calgary winters don’t exactly make it easy to order in every night, so getting your burner diagnosed and fixed matters. At Calgary Appliance Service Pros, we field calls about stovetop burner problems regularly, and the good news is that many of these issues have a clear cause and a straightforward fix.
Older homes tend to have older appliances, and the wear patterns we see in areas like Bridgeland and Inglewood – where a lot of the housing stock dates back several decades – are pretty consistent. Coil elements burn out. Receptacles corrode. Switches eventually fail. None of that is unusual, and none of it automatically means you need a new stove.
Key takeaways
- A single burner that won’t heat on an electric stove is most often caused by a failed heating element, a burnt or loose receptacle, or a faulty infinite switch controlling that burner.
- You can do a quick diagnostic at home by swapping a coil burner with a working one of the same size – always with the stove unplugged and fully cooled first.
- Replacement coil elements and terminal blocks are inexpensive, often running between $10 and $30, making them worth trying before assuming the stove is done.
- Gas burner ignition problems are frequently caused by clogged burner ports or a wet igniter, both of which can be cleaned without calling a technician.
- If multiple burners fail at once, or you see burn marks on internal wiring, stop troubleshooting and call a professional – that points to a power supply or wiring issue.
- A tripped circuit breaker, a loose power cord, or an activated control lock can all mimic a “broken” burner when the stove is actually fine.
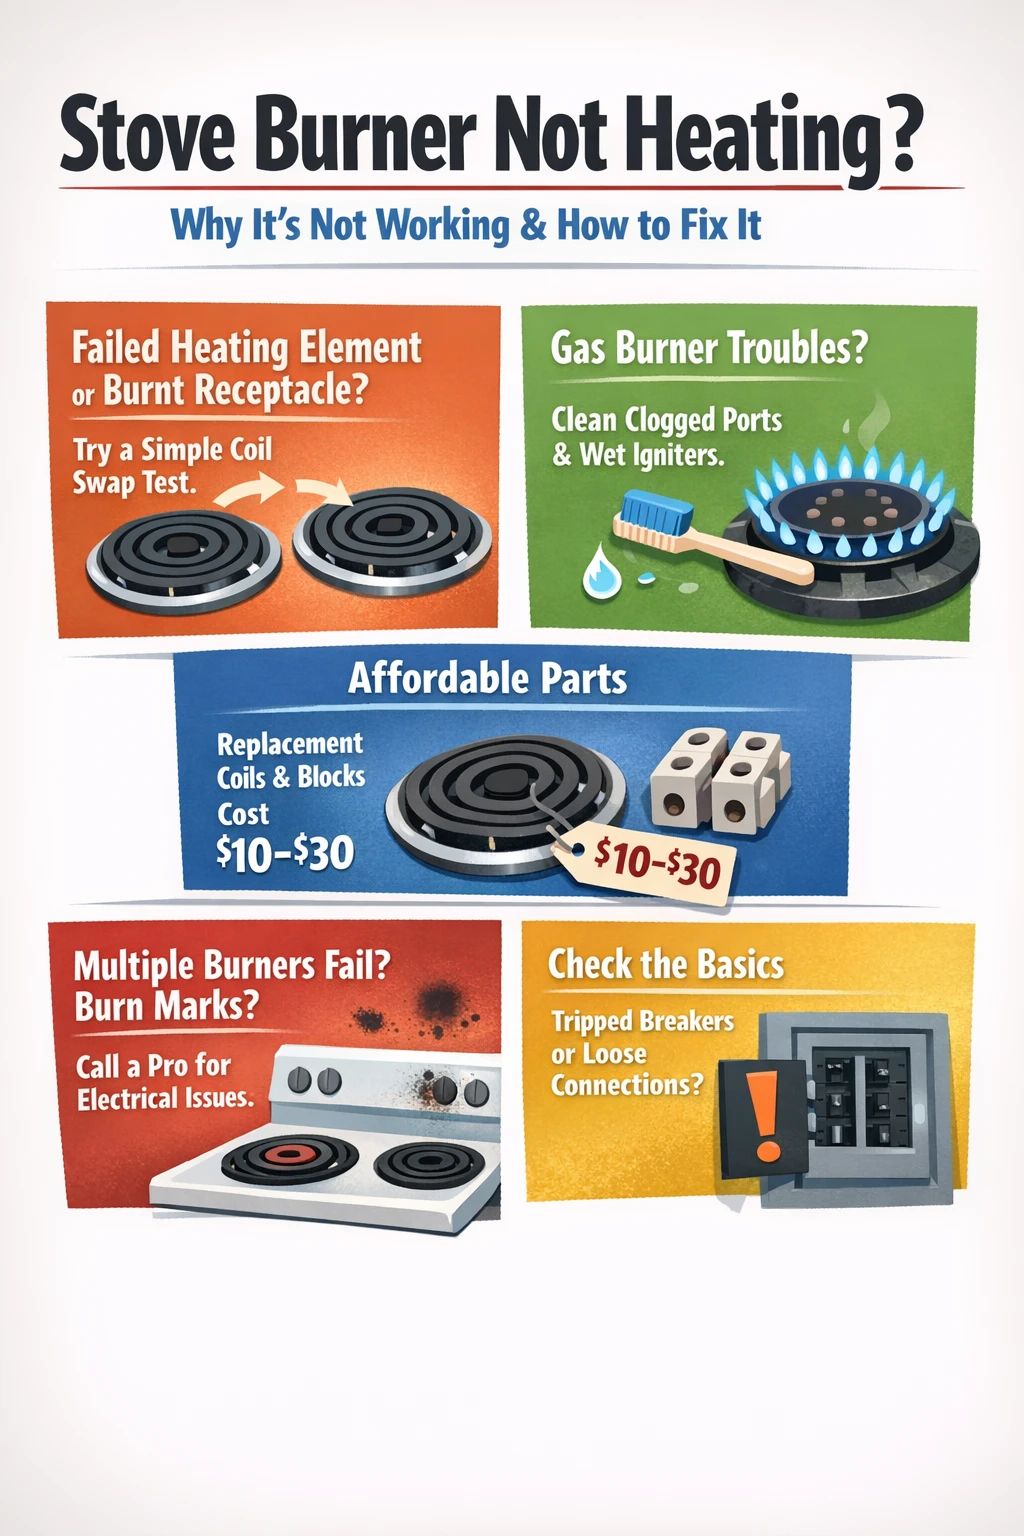
Why your stove burner stopped heating
On an electric range, a burner that won’t heat is almost always one of four things: the heating element itself has failed, the receptacle it plugs into is burnt or loose, the infinite switch controlling that burner has gone bad, or there’s a power supply issue affecting that circuit. That’s the short answer. Most single-burner failures trace back to one of the first two.
The swap test tells you a lot. With the stove unplugged and completely cool, pull the suspect coil out and plug it into another burner socket of the same size. Turn it on. If it heats up fine, the problem is in the original socket – the receptacle or the switch behind it, not the element. If it still won’t heat in the new position, the element itself is dead and needs replacing. Simple, cheap, and you don’t need any tools to do it.
Gas stoves follow a different logic. If the burner clicks but won’t ignite, the igniter is usually fine – the problem is often a clogged burner port or moisture in the burner from a recent boil-over. If there’s no click at all, you may be looking at a faulty igniter or a wiring issue between the igniter and the control. And if the knob turns but nothing happens electrically, start at the basics: check whether the gas valve is open and whether the unit is plugged in. It sounds obvious, but it’s the first thing to rule out.
Electric stove burner not working: diagnosing the element and receptacle
The heating element on a coil-style electric stove takes a lot of abuse over its lifetime. It expands and contracts with every use, the prongs that plug into the receptacle get pushed and pulled repeatedly, and eventually something gives. When an electric stove burner stops working, the element is the first place to look.
Visually inspect the coil before anything else. Look for obvious signs: a blister, a crack, a break in the coil, or any section that looks discolored differently from the rest. Sometimes the damage is subtle – just a small dark spot or a section that looks slightly swollen. You don’t need to see a dramatic break to have a failed element. 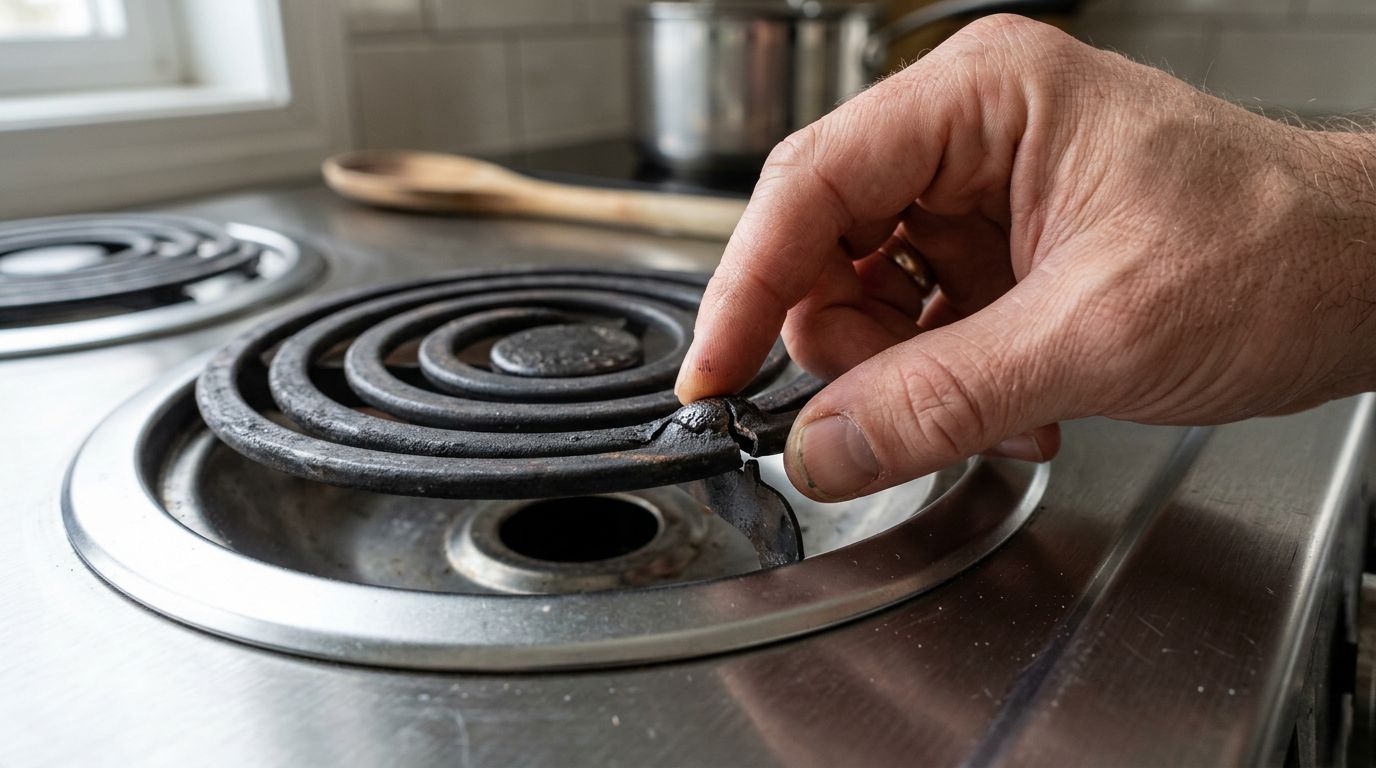 If the coil looks unusual in any way, treat it as a suspect. The only way to confirm it with certainty is a continuity test using a multimeter, but the visual check gets you most of the way there on a coil-style burner.
Now, look at the prongs and the receptacle socket. If you see black or burnt marks on the prong tips, or the socket looks scorched, that receptacle has arced. Heat, grease, and moisture accumulate in that socket over time and can cause intermittent arcing that eventually damages both the element and the socket. Here’s the thing about replacing a burnt receptacle: if the socket caused the element to fail, and you put a new element into a damaged socket, you’re going to be back in the same situation within a year. Replace both. The receptacle terminal block runs about $8 to $15 at most appliance parts suppliers, so there’s no reason to cut corners here.
Checking for a faulty infinite switch
Each burner has its own dedicated control switch, usually called an infinite switch. This is the component behind the knob that regulates how much power gets to the element throughout the cooking cycle. It turns the circuit on and off repeatedly to maintain whatever heat level you’ve selected.
A burner that only heats on high is a classic sign of a failing infinite switch. So is a burner where the knob feels loose, doesn’t click through the settings properly, or where the burner seems to cycle erratically. On an older Frigidaire electric range, for example, the original switch (part number 316021500) was eventually replaced by a cross-compatible part (316436000) – both use the same terminal labels (L1, L2, H1, H2, and P), though the layout differs slightly on the replacement. Checking your model’s wiring diagram before swapping switches is worth the extra five minutes. Switches cannot be repaired; they get replaced.
Glass-top and radiant burner problems
Smooth glass-top stoves have a different failure mode than coil burners. The radiant elements sit beneath the ceramic glass surface and aren’t visible or accessible from above, which makes them harder to diagnose at home. If a glass-top burner isn’t glowing red at all, or if only part of a dual or triple-zone element heats up, the radiant element has likely failed. Cooking times that suddenly increase, even when the burner appears to be working, are another sign.
Accessing a radiant element requires lifting or removing the cooktop surface, which varies by model. Some stoves require pushing the upper panel back before lifting, others have a hinge at the back. Always check your owner’s manual before attempting this – the glass cooktop surface itself can crack if handled incorrectly, which turns a $50 repair into a much more expensive one. For most homeowners, radiant element replacement on a glass-top is a job that sits right at the edge of comfortable DIY territory. If you’re not confident, it’s a reasonable call to bring someone in.
One thing that trips people up with glass-top stoves: the element cycles on and off during cooking to maintain temperature. If you look over and don’t see it glowing, wait a moment. It may just be in its off cycle. If it never comes back on, then you have a problem. Also worth checking – pan size matters more on glass tops than coil burners. Using a small pan on a large element heats the element inefficiently and can cause uneven cooking that gets mistaken for a malfunction.
Gas stove burner won’t light: what to check first
Gas stovetop problems usually announce themselves with either a clicking sound and no flame, or complete silence when you turn the knob. Each situation points somewhere different, and most of the initial checks are things you can handle without any tools.
If the burner clicks but won’t light, moisture is the first suspect. A pot that boiled over, or grease that splattered near the burner cap, can wet the igniter and prevent ignition. Turn off all burners, remove the grate and burner cap, and let everything dry out completely – sometimes just an hour of air drying solves it. While you’re in there, clean the burner ports with a stiff brush and use a toothpick or thin needle to clear any clogged holes. 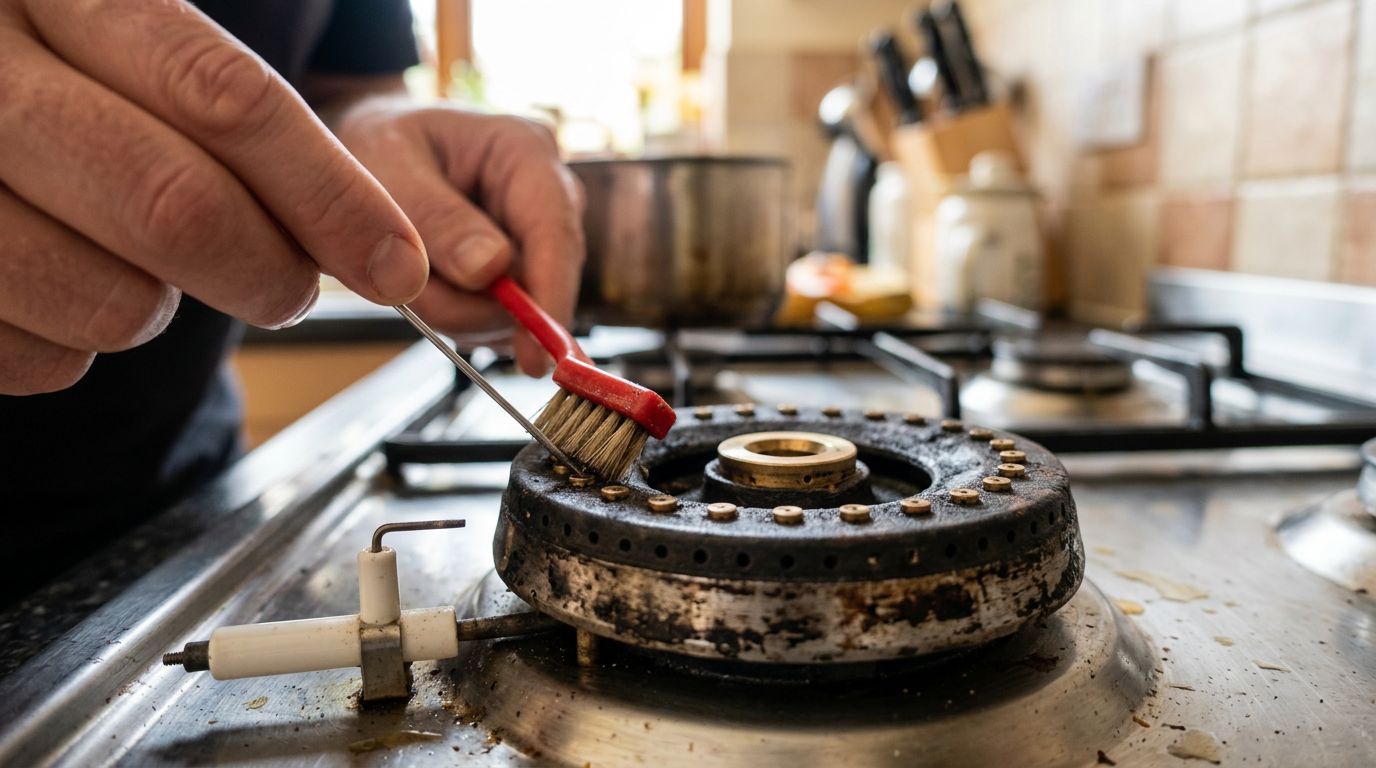 Clogged ports restrict gas flow and cause uneven or failed ignition. This is one of the most common fixes we see on gas stoves, and it costs nothing but a few minutes.
Pay attention to the color of the igniter sparks when you test a gas burner. Healthy sparks should be white with a blue tint. If you’re seeing yellow or orange sparks, the igniter may be on its way out. If there’s no clicking sound at all when you turn a knob, check whether all the burners are silent or just one. If it’s all of them, check the power supply – gas stoves still need electricity for the ignition system, and a tripped breaker cuts the igniter even though the gas valve itself is still open. For a safe approach to gas appliance troubleshooting, always make sure you’re working in a well-ventilated space and never near an open flame.
Simple things to check before assuming something is broken
Before you start pulling coils and checking switches, run through the quick list. These aren’t dramatic fixes, but they account for a surprising number of “broken burner” calls.
Check the circuit breaker. Electric ranges run on a 240-volt circuit, and if that breaker has tripped, nothing on the stovetop will work. Even gas stoves need a 120-volt connection to power the ignition system. A partially tripped breaker – one that hasn’t fully flipped to the off position – can cause confusing symptoms where some functions work and others don’t. Reset it fully and test again.
Check that the power cord is seated properly. On slide-in and freestanding ranges, you may need to pull out the lower storage drawer to see where the cord connects. It sounds too simple, but a loose cord at the wall outlet or at the appliance can cut power selectively. While you’re at it, confirm the outlet matches what the stove requires – electric cooktops typically need a 240-volt outlet, while gas stoves generally need 120 volts for the igniter circuit.
Check the control lock. Many newer stoves include a control lock feature that prevents the burners from activating. If someone accidentally activated it, the stove will appear completely dead. The indicator for this varies by brand, so check your product manual if the display looks unusual. Also worth a mention: double-check that you’re turning the right knob. In a hurry, it’s easy to turn the back-left knob while staring at the front-right burner and wonder why nothing’s happening.
And if all else fails before calling anyone, try resetting the stove by turning off the circuit breaker for a full minute, then switching it back on. The U.S. Department of Energy’s appliance guidance touches on how electrical resets can clear minor control faults on modern appliances.
When to call a professional instead of doing it yourself
Plenty of burner repairs are well within reach for a motivated homeowner. A coil element swap, a terminal block replacement, cleaning a gas burner – these are all reasonable DIY tasks if you’re comfortable with basic appliance work. But there are situations where the right call is to step back and get a professional involved.
Multiple burners failing at the same time is a red flag. That usually points to a power supply problem – a partially tripped breaker, a wiring issue, or a failing control board – rather than individual component failures. Similarly, if you open the back panel and find burnt wiring, melted insulation, or heat damage to the terminal connections, stop. 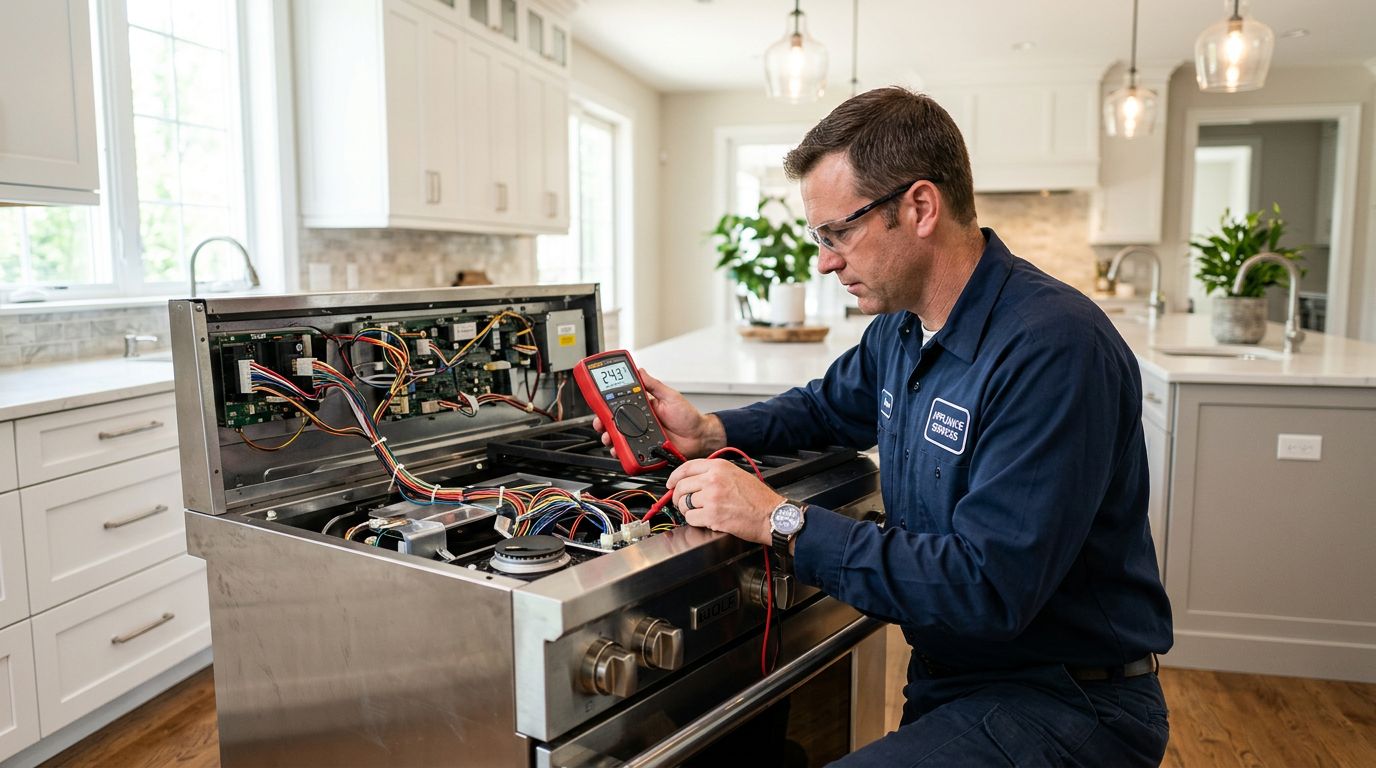 Internal electrical damage needs a professional diagnosis. The repair itself may be straightforward, but confirming the scope of the damage safely takes experience and the right test equipment.
Glass-top radiant element failures are another case where professional help often makes sense. The diagnosis requires checking for continuity beneath the glass surface, and the reassembly has to be done correctly to avoid cracking the cooktop. We see this fairly often in newer homes in communities like Mahogany and other areas of southeast Calgary where glass-top ranges are common in the stock builds from the last decade or so.
If your stove is around 20 years old and the repair cost is approaching what a replacement would run, that’s also worth factoring in. A $15 burner element on a functional stove is an obvious repair. A $300 control board on a stove that’s already showing multiple signs of wear is a different conversation. Honest advice: sometimes the repair makes financial sense, and sometimes it doesn’t. A good technician will tell you which situation you’re in before you commit to the work.
Frequently asked questions
Most of the questions we hear about stove burner problems come down to a few common scenarios. Here are the ones that come up most often, with straightforward answers.
Can I replace just one burner coil, or do I need to replace them all?
You can absolutely replace just the failed coil. Burner elements on coil-style electric stoves are independent components and they’re sold individually. You just need to match the size – most stoves have two small elements (6 inch) and two large elements (8 inch), and you can’t swap sizes. If you’re ordering a replacement, have the stove model number handy so you get the right fit. Replacement coils from appliance parts suppliers typically run $10 to $25 depending on the brand.
Why does my burner work on high but not on lower settings?
That’s almost always the infinite switch. The switch controls the cycling pattern that maintains lower heat settings – if it’s failing, the burner may only respond at full power before the switch takes over. It’s a part that wears out over time, especially on burners that get heavy daily use. The switch can’t be repaired; it needs to be replaced. It’s a manageable repair for someone comfortable with basic appliance work, but it does involve disconnecting wiring at the back of the control panel, so take photos before you start and make sure the stove is unplugged.
My gas burner keeps clicking even after it lights. What’s going on?
Continuous clicking after ignition is almost always caused by moisture or food debris on or around the igniter. The igniter is sensitive to contamination, and even a small amount of liquid near it can cause it to keep firing. Remove the burner grate and cap, clean around the igniter with a dry cloth or soft brush, and let it dry thoroughly. If the clicking persists after cleaning and drying, the igniter module itself may be worn and need replacing.
The burner light is on, but nothing heats. Does that mean it’s getting power?
Not necessarily. The indicator light on many stoves is wired to the knob switch, not directly to the element circuit. It can illuminate even if the infinite switch downstream isn’t sending power to the element. This is why the swap test is more useful for diagnosis than relying on the indicator light. Confirming whether voltage is actually reaching the receptacle requires a multimeter test, which most homeowners can do safely with the stove off and cooled first.
How do I know whether to repair or replace my stove?
The general rule is that if the repair cost is less than 50% of the replacement cost and the stove is under 15 years old, repair usually makes sense. A single failed element on a functional stove is an easy call – fix it. A major control board failure on a 20-year-old range with multiple issues is a different calculation. Age, overall condition, and the cost of parts for your specific model all factor in. A technician who gives you a clear diagnosis before recommending repair is the kind of professional worth working with.
Wrapping up
A stove burner that won’t heat is almost always fixable, and in many cases it comes down to something as simple as a $15 coil element or a 10-minute cleaning session. Start with the basics – check the breaker, check the power cord, try the swap test on a coil burner, and clean the gas ports before assuming the worst. If those steps don’t solve it, the problem is usually the receptacle, the infinite switch, or the element itself, all of which are replaceable. Where things get more serious – burnt wiring, multiple burners failing, glass-top element problems – that’s when it’s time to bring in a professional who can test properly and give you an honest read on the repair.
At Calgary Appliance Service Pros, we handle stovetop diagnostics and repairs across Calgary and the surrounding communities. If you’re not sure what you’re looking at, or you’d rather not deal with it yourself, give us a call and we’ll help you figure out the best path forward.
