
Your freezer is humming along just fine, but the ice maker has gone silent – no cubes, no sounds, just a whole lot of nothing. This guide walks you through the most common reasons a refrigerator ice maker stops working and gives you clear, practical steps to get things running again.
An ice maker that quits on you is one of those problems that sneaks up slowly. First you notice the bin is half empty, then one day you reach in and it’s bone dry. For homeowners in Calgary, where we swing from dry summers to hard winters, appliance quirks like this tend to show up at the worst possible times. Cold snaps can mess with freezer temperatures, and Calgary’s water supply, which runs reasonably hard in some areas, can do a number on water filters and inlet valves faster than you’d expect.
At Calgary Appliance Service Pros, we get calls about fridge ice makers stopped working more often than you might think. The good news is that most of the time, the fix is simpler than it looks. A lot of these issues come down to a handful of usual suspects, and we’re going to walk through all of them.
Key takeaways
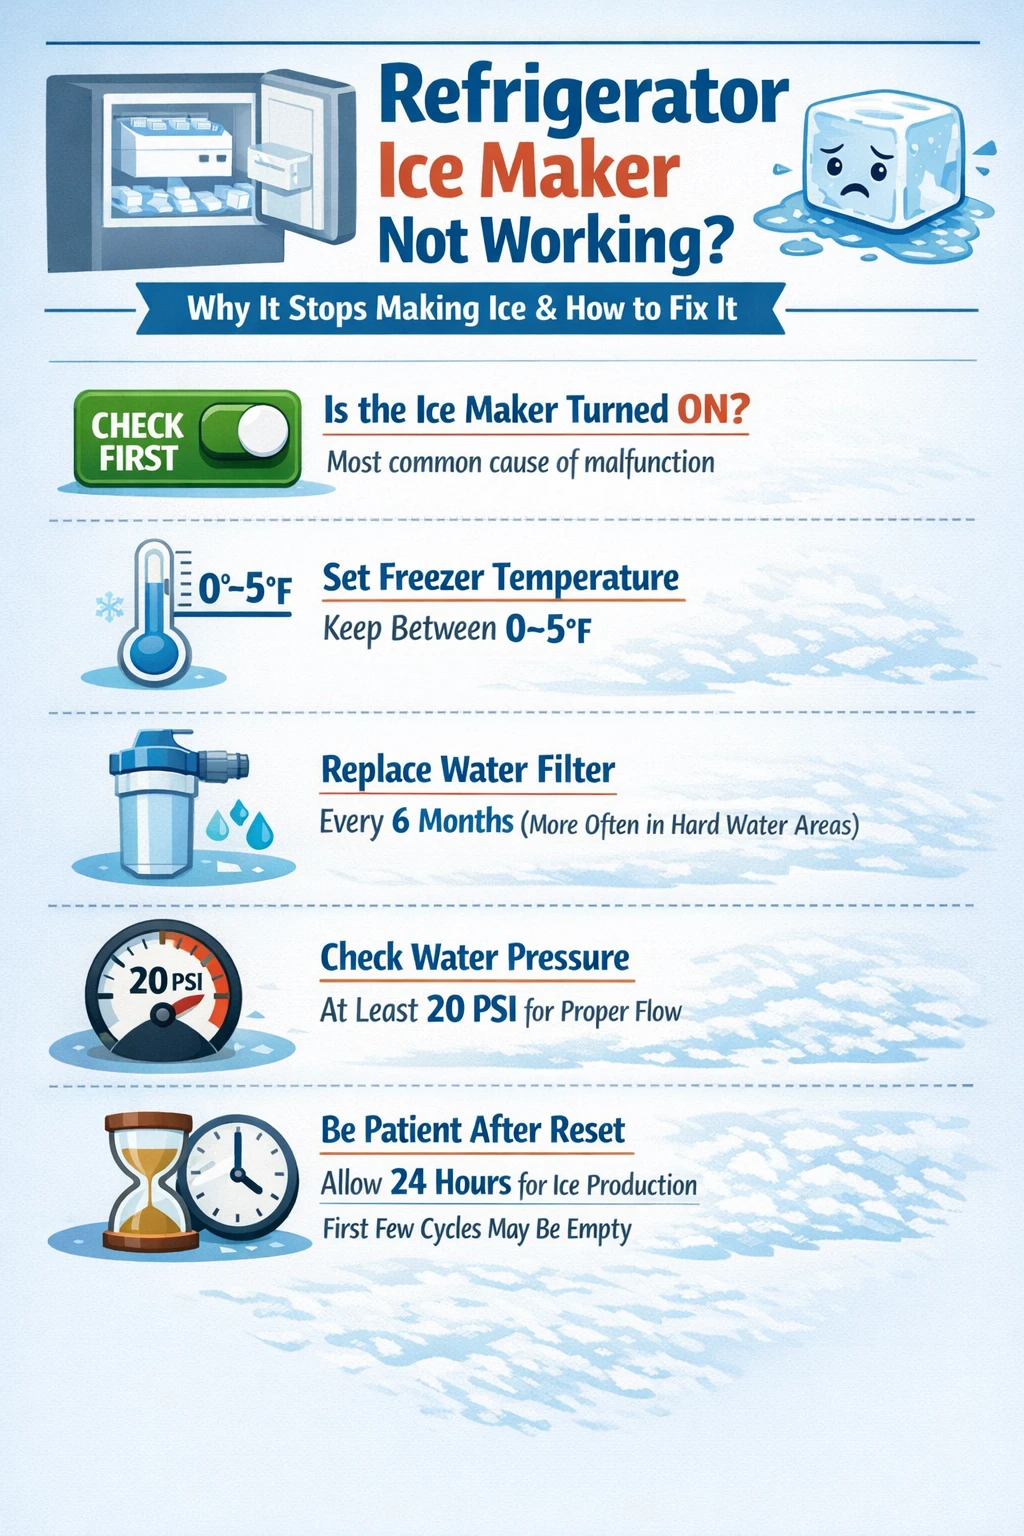
- The ice maker being accidentally switched off is one of the most common causes, always check this first before anything else.
- Freezer temperature must stay between 0 and 5 degrees Fahrenheit (-18 to -15 degrees Celsius) for the ice maker to function properly.
- A clogged water filter is a frequent culprit, manufacturers recommend replacing it every 6 months, though hard water areas may need more frequent changes.
- Water inlet valves require at least 20 psi of water pressure to open and close correctly; anything less and ice production slows or stops.
- A new refrigerator ice maker needs up to 24 hours after installation to begin producing ice, and the first 2 or 3 cycles may be empty due to air in the lines.
- Some issues, like a frozen auger motor or a faulty water inlet valve, are better handled by a technician than tackled as a DIY project.
Why your ice maker stopped making ice
Most of the time, a refrigerator ice maker not working comes down to one of four things: the unit got accidentally turned off, the water supply is restricted, the freezer isn’t cold enough, or the water filter is overdue for a change. That covers probably 80% of the calls we see. If you work through those four in order, there’s a good chance you’ll find your answer before you ever need to pick up the phone.
The ice-making process works in a timed cycle. A valve opens to fill the mold with water, a thermistor waits until the water is frozen solid, then a heating element loosens the cubes and a motor pushes them into the bin. A shut-off arm monitors the ice level and pauses production once the bin is full. Any weak link in that chain, a stuck valve, a warm freezer, a blocked water line, can bring the whole cycle to a halt.
In our experience, the problem that surprises people most is how often the ice maker has simply been bumped into the off position. It happens when you’re loading groceries or pulling something out of the freezer. The control arm gets nudged, or someone brushes the panel. Worth checking before you do anything else.
Check the basics first
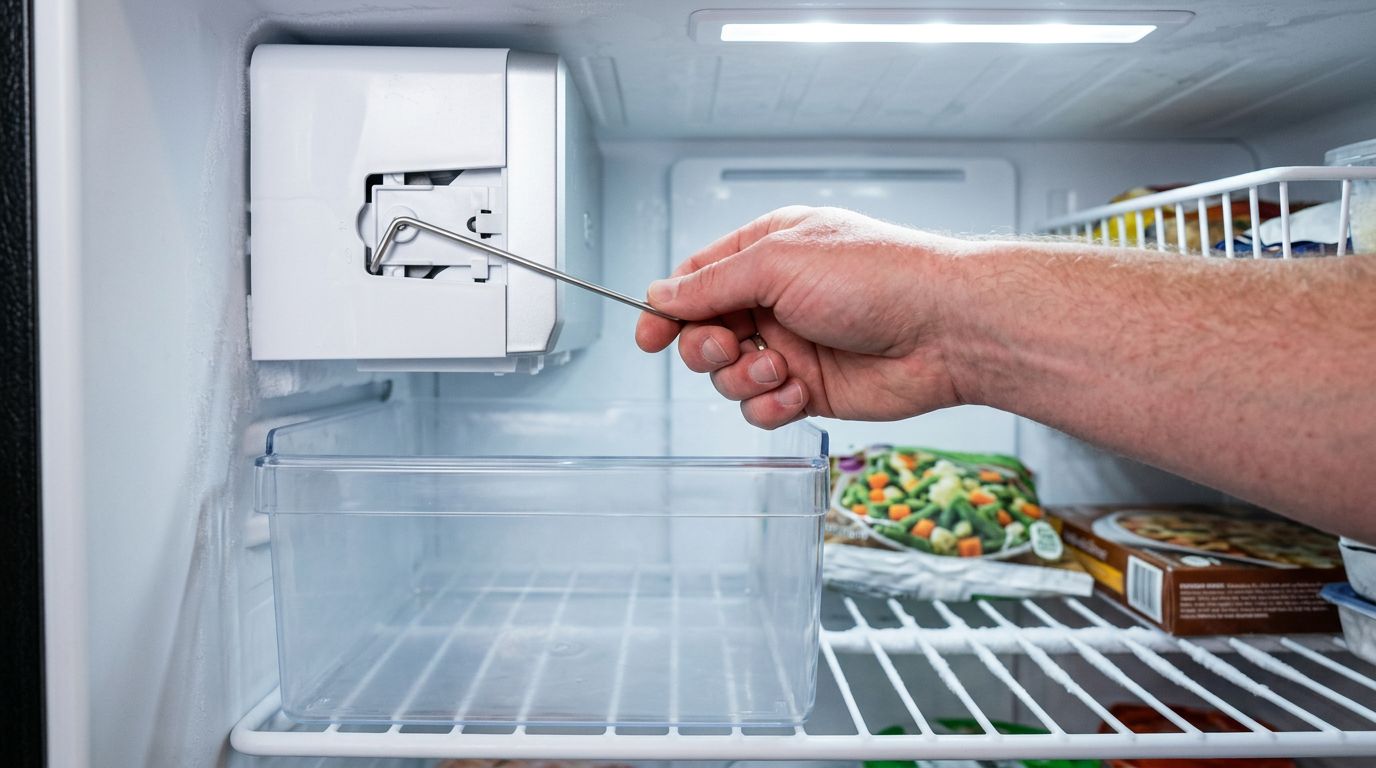
Before pulling the refrigerator away from the wall or calling anyone, run through the quick checks. They take under five minutes and they solve the problem more often than you’d think.
First, confirm the ice maker is actually turned on. On most models, there’s a visible indicator on the display, or a wire shut-off arm on the side of the ice bin. The arm should be in the down position to allow ice production. If it’s raised up, lower it. If your model has a dedicated on/off button, check that the indicator light is illuminated. Consult your owner’s manual if you’re not sure where to look, every brand handles this a little differently.
Next, try a reset. Unplug the refrigerator for one full minute, then plug it back in. Some ice makers have their own reset button, press and hold it for a few seconds. After resetting, give the unit a couple of hours before checking for ice. Minor electronic hiccups can freeze up the cycle, and a power reset often clears them. It sounds almost too simple, but it works.
Temperature problems and why they matter more than you think
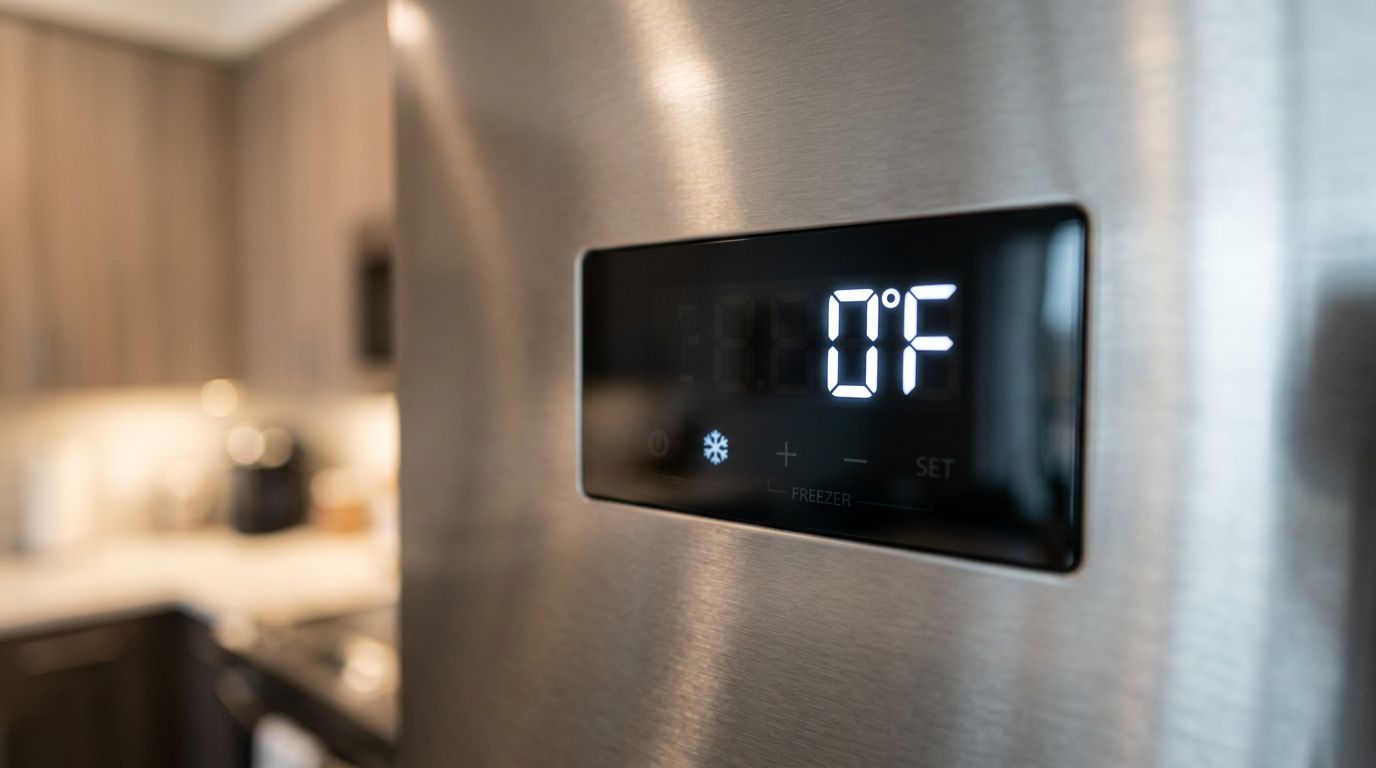
Temperature is the backbone of ice production. If the freezer isn’t cold enough, the water in the mold never fully freezes and the cycle stalls. If it’s too cold, you get a different set of problems, more on that in a moment.
The target is 0 degrees Fahrenheit (-18 degrees Celsius) for the freezer. The ice maker itself needs to reach 16 degrees Fahrenheit before it will even start a cycle. If your freezer is running warmer than 5 degrees Fahrenheit, ice production will slow down noticeably, and above 10 degrees it may stop altogether. Check your temperature settings and give the unit 24 hours to stabilize after any adjustment.
Here’s the thing people don’t always know: a near-empty freezer runs warmer than a full one. Frozen food acts as a thermal mass, helping the compartment hold its temperature when you open the door. If your freezer is mostly empty, try filling some space with bags of ice or frozen items. Keeping it about three-quarters full helps the temperature stay consistent and supports steady ice production.
On the other end, temperatures dropping below -10 degrees Fahrenheit can cause the outer shell of the ice cube to freeze too fast, triggering the thermostat to eject the cube before the center has solidified. You end up with hollow or unusually small cubes. If that’s what you’re seeing, nudge the temperature setting up slightly and monitor the results.
Water supply issues: the line, the valve, and the filter
The supply line
Pull the refrigerator away from the wall carefully and check the water line running to the back. A kinked line is surprisingly common, people push the fridge back against the wall too hard and the line gets pinched. Straighten any kinks you find. The line should have a loose coil (called a service loop) so you have some slack to work with. If the line has a kink that’s left a crease, it may need to be replaced rather than just straightened, since a creased line will restrict flow even after you bend it back.
Also check that the shutoff valve supplying the refrigerator is fully open. They can get partially closed accidentally, especially after any work has been done in the area. A partially open valve reduces water pressure, and if pressure drops below 20 psi, the inlet valve can’t open properly.
The water inlet valve
The water inlet valve sits at the back of the refrigerator where the supply line connects. It opens and closes electronically to let water through to the ice maker. Two things can go wrong with it: the valve itself can fail mechanically, or the water pressure feeding it can be too low.
If you have 20 psi or better coming in but the ice maker still isn’t getting water, the valve itself likely needs replacing. That’s a job that’s doable for a confident DIYer with basic tools, but if you’re not comfortable working behind the appliance with water lines and electrical connections, it’s a reasonable one to hand off. We see this fairly often in older homes around areas like Hillhurst and Inglewood, where plumbing and appliances have both had some years on them.
The water filter
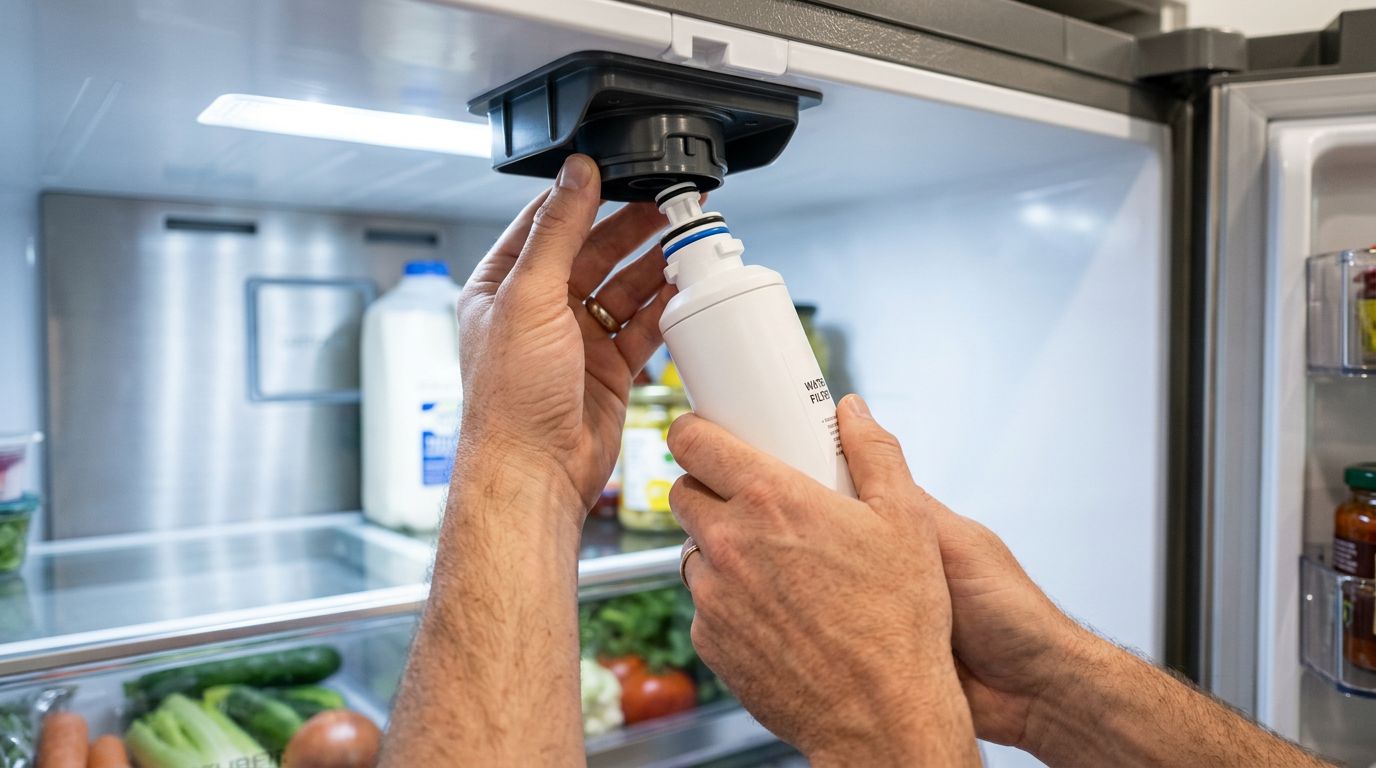
A clogged water filter quietly chokes off water flow to the ice maker over time. Most manufacturers recommend replacing it every 6 months. Signs that the filter is overdue include slow water dispensing, off-tasting water or ice, and of course, reduced or zero ice production. If your area has construction nearby or harder water, you may need to change it more frequently than the 6-month standard.
If you recently replaced the filter, double-check that it’s locked in place correctly and creating a proper seal. An improperly installed filter can restrict flow just as much as a clogged one. A quick test: remove the filter entirely and try to dispense water. If water flows freely without the filter in, the filter was either installed wrong or is due for a replacement.
You can find more information on replacing water filters through the Maytag water filter replacement guide or your refrigerator manufacturer’s support page.
When the ice maker is frozen solid
Sometimes the problem isn’t that the ice maker won’t make ice, it’s that it’s frozen in place. This tends to happen more during cold spells, which in Calgary means it’s a winter-season call we get with some regularity.
The water inlet tube at the rear of the ice maker is the most common freeze point. When freezer temperatures run even slightly too cold, water sitting in the tube can freeze before it ever reaches the mold. The symptom is an ice maker that runs through its cycle but never gets any water, you might hear the mechanism operating without any ice actually being produced.
You can thaw the inlet tube yourself using a hair dryer on a low setting or warm water applied carefully. Move slowly and don’t apply heat directly to plastic components for too long. Once it’s thawed, adjust the freezer temperature to 0 degrees Fahrenheit and see if the problem comes back. If it keeps freezing, the issue may be with the insulation around the tube, or the thermostat may be running cold. That’s the point where a technician’s eye is worth it.
A frozen auger motor, the mechanism behind the freezer wall that pushes ice toward the dispenser, is a more involved problem. Defrosting it yourself risks damaging the motor with excess moisture. This one is worth a professional repair call rather than a DIY attempt.
Ice maker is making ice but not dispensing
This is a different problem than no ice production, and it’s worth separating out. If you can see or hear ice being made but nothing comes out when you press the dispenser, the issue is usually in the dispensing mechanism rather than the ice-making cycle.
The most common cause is a clump or blockage in the dispenser chute. Ice that sits for a while, especially if it’s melted and refrozen slightly, can fuse together into chunks the auger can’t break up. If you hear a grinding noise when you press the dispenser, that’s likely what’s happening. Small clumps can be broken up by hand. Larger ones may require removing the ice bin and defrosting it completely.
Check inside the chute itself by looking up into it carefully. Loose cubes can get wedged at odd angles and block the opening. Jiggle them free if you can reach them. If ice is solidly lodged, put a towel and a bowl under the dispenser and let it melt on its own rather than chipping at it, the chute lining can crack if you get aggressive with it.
If the bin and chute look clear but ice still won’t dispense, check the control arm and the bin’s position. The bin needs to sit correctly in its slot for the mechanism to work. A bin that’s slightly out of position can cause the arm to misread the ice level, or prevent the auger from engaging properly. For Whirlpool refrigerator owners experiencing this, the Whirlpool ice maker troubleshooting resource has model-specific guidance worth checking.
Other things that can go wrong
Once you’ve ruled out the usual suspects, a few less common issues are worth considering.
The ice maker’s thermostat controls when the heating element fires to release cubes from the mold. If it malfunctions, the cycle never completes. You can test it with a multimeter for continuity, if it reads open, it needs to be replaced. This is intermediate-level DIY territory.
Modern ice makers use sensors to monitor the ice level in the bin. If a sensor fails or gets coated in debris, it may report a full bin when the bin is actually empty, stopping ice production unnecessarily. Check for anything obstructing the sensor’s line of sight and clean it gently if needed.
Finally, if the rake or ejector arm that pushes cubes out of the mold is stuck or broken, the ice maker can’t complete its cycle even if everything else is working. Check for cubes that may be jammed in the mold, and be careful, the mold can be warm right after a cycle. If the mechanism appears physically broken, it’s time for a repair visit.
For a helpful visual walkthrough of the most common ice maker problems, the GE Appliances ice maker troubleshooting video covers the basics in plain language. (Search “GE Appliances ice maker troubleshooting” on YouTube to find the official video from their channel.)
Frequently asked questions
After working through the sections above, you probably have a clearer picture of what might be going on with your ice maker. These are the questions we hear most often when people call us, they tend to come up regardless of brand or model.
How long does it take for an ice maker to start working after being reset?
After a reset, give the ice maker about 24 hours before expecting full production. The freezer needs time to stabilize at the correct temperature, and the ice-making cycle itself takes time to complete. If you’ve just had a new refrigerator installed, the first 2 or 3 cycles may produce little or no ice because of air in the new water lines, that’s completely normal and clears on its own.
Why does my ice taste strange even though the maker is working?
Strange-tasting ice is almost always a water filter issue. An overdue filter stops removing contaminants effectively, and those make their way into your ice. Replacing the filter every 6 months usually solves it. If the taste persists after a new filter, old ice sitting in the bin can be the culprit, ice absorbs odors from surrounding food over time, especially if anything in the freezer is poorly wrapped. Dump the old ice, let the bin fill fresh, and see if that makes a difference.
My ice maker makes a loud buzzing or chattering noise. What does that mean?
A buzzing or chattering noise typically means the ice maker is trying to draw water but can’t get any. The most common cause is that the water supply line isn’t connected or the shutoff valve is closed. It can also happen if the ice maker is left on after a water filter removal without being turned off. Check your water supply connection first. If the line is connected and the valve is open but the noise continues, the inlet valve may be the problem.
When should I call a repair technician instead of troubleshooting myself?
Call a technician if you’ve worked through the basics, temperature, water supply, filter, reset, and nothing has changed. You should also call if the issue involves the water inlet valve (which requires working with both water lines and electrical connections), a frozen auger motor, or any signs of water leaking outside the refrigerator. Leaks left unaddressed can cause floor damage and mold, and diagnosing the source properly usually requires pulling the unit fully away from the wall. A professional can diagnose and repair it faster than most homeowners can safely figure it out on their own.
Can I prevent ice maker problems before they start?
Yes, and it doesn’t take much. Replace the water filter every 6 months. Keep the freezer at least three-quarters full to help maintain stable temperatures. Check the water line behind the fridge once a year to make sure it hasn’t been pinched. And if you notice anything unusual, odd noises, smaller cubes, slower production, catch it early before it turns into a full stop. Most ice maker problems give you warning signs before they quit entirely.
Wrapping up
A refrigerator ice maker not working usually comes down to something straightforward, the unit got switched off, the filter is overdue, the freezer temperature is off, or there’s a restriction in the water supply. Start with those four and you’ll resolve most problems without needing to call anyone. If you’ve been through all of it and the ice maker is still not producing, or if you’re dealing with a frozen inlet tube, a failed valve, or anything that involves water and wiring together, that’s a reasonable point to bring in some help. At Calgary Appliance Service Pros, we handle ice maker repairs and all kinds of fridge repair in Calgary and the surrounding area, including areas like Signal Hill and Varsity where we get regular calls on appliance issues. Give us a call and we’ll help you figure out what’s going on and the best way to fix it.
